Wednesday, July 18, 2012

Homemade Cinnamon Marshmallows

This Saturday I'm providing most of the desserts for my sis-in-law's baby shower and one of the things I am making is Homemade Marshmallows!  Let me tell you...these are absolutely yummy!!!  The shower has a "Bun in the Oven" theme and we're playing off of the cinnamon bun flavors so I added cinnamon to these to tie it into the theme.

The recipe I used I found on Bakerella's blog that she had posted from a recipe book called Marshmallow Madness.  I had tried a marshmallow recipe from my Martha Stewart cookbook years back and those came out just fine but I wanted to try something new.  Yesterday I tried another marshmallow recipe that used egg whites and I thought those looked wonderful from the blog I saw it on but they came out very wet and the powdered sugar got crusty.  Now, I don't know about you but the only thing I like to be crusty is fresh, baked bread.  Anything else and I think it has a negative connotation.  If you know of something else that is good when crusty I'd like to know about it.

Back to marshmallow making!  So when I realized my first batch was (ahem)...crusty, I was determined to try again.  That's when I remembered Bakerella had posted a recipe and I know her stuff turns out delicious!  I decided to give it a try.  The thing that stuck out right away was that this recipe had no eggs!  Just what I was looking for.  The recipe says to spray your pans but I wasn't taking any chances because I know, from experience, what a booger marshmallows can be to get out if not done properly.  So, I decided to use wax paper to line my pans and then grease them down.  Also, the recipe says to use a 9x13 but I knew I wanted mine to be a little thicker so I used an 8x8.  The list of ingredients is SUPER simple!!!

Gelatin, sugar, syrup, salt, vanilla, candy thermometer

 Let the gelatin bloom in cold water.

 Boil your sugar, syrup and some water in a pot with the thermometer.

 Mix more syrup with the gelatin that you've warmed to liquify it.

 Let the sugar reach 240º F.

 Add it to the mixer with the gelatin and syrup.

Mix on medium for 5 min. then medium-high for 5 more.

Mix on high for 2-3 min. for it to come together and add your flavorings.  This is where I added the cinnamon.  You want the bowl to be cool to the touch.  The book doesn't say that but that's what I do and it works for me.

Pour it in your prepared pan.

Make a powder sugar and cornstarch mix.

Generously dust that over the top to cover and let it sit for at least 6 hours.

Flip it out of the pan and peel off the paper if using.  It looked beautiful already!

Now here you can snip with scissors, which I did on the first strip (too jagged for me), or I used a large knife on the rest and that seemed to make cleaner cuts for the look I was going for.

Then, I used my scissors to cut squares out of the strips and tossed them in the powder mix to coat all sides.  I LOVED the way they turned out!

 They even tasted divine with the cinnamon!  If you've never tasted a homemade marshmallow you are seriously in for a treat!  They are incredibly soft, light, and not overly sweet.  They kind of melt in your mouth and you can flavor them so many ways!

I'll definitely be making another batch tomorrow to take to the shower 'cuz these bad boys with go like hotcakes! 

I think I'll make them pink, orange and green!  To match the shower colors.

Here's how I did it adapted from Marshmallow Madness by Shauna Sever.  Enjoy!

Vanilla Marshmallows
Bloom Stage
4 1/2 teaspoons unflavored powdered gelatin
1/2 cup cold water
Syrup Stage
3/4 cup sugar
1/2 cup light corn syrup, divided
1/4 cup water
1/8 teaspoon salt
Mallowing Stage
2 teaspoons pure vanilla extract
1 teaspoon cinnamon
Classic coating (Sift together 1 1/2 cups confectioners’ sugar and 1 cup cornstarch)
  • Lightly coat an 8x8 inch baking pan with shortening.  Use a paper towel to wipe and coat the surface of the pan evenly.  Line the pan with wax paper and coat again with shortening.
  • Add gelatin to a bowl of cold water. Whisk together and let soften for about 10 minutes.
  • In a 1 1/2 quart saucepan, stir together the sugar, 1/4 of the corn syrup, water and salt over high heat.
  • Boil, stirring occasionally until the temperature reaches 240º F on a candy thermometer. (Make sure the tip does not touch the bottom of the pot)
  • While boiling, pour remaining 1/4 cup of corn syrup into the bowl of an electric mixer fitted with the whisk attachment. Microwave gelatin on high for about 30 seconds. Stir again and pour into the mixer bowl. Set the speed to low and keep it running.
  • When the syrup reaches 240º F, slowly pour it into the mixer bowl.
  • Increase speed to medium and beat 5 minutes.
  • Increase speed to medium high and beat 5 more minutes.
  • Increase speed to highest setting and beat 2-3 minutes.
  • Beat in vanilla and cinnamon or other preferred flavoring.
  • Pour into prepared pan, using an offset spatula to quickly smooth it out.
  • Sift classic coating evenly and generously over the top. Let set for at least 6 hours in a cool, dry place.
  • Invert pan on a baking sheet lined with wax paper.  Gently pull away wax paper that is now on top.  Dust with more classic coating.
  • Cut into squares using a knife or scissors or use a cookie cutter.  Dip sticky/cut edges of marshmallows into the coating and drop several coated mallows in a sieve and shake off any excess.
  • Store in an cool dry place in a pan with the lid slightly ajar to allow air flow. If the mallows resist drying, you can simply dust with more coating for any edges that are damp.
As always, be blessed, thanks for stopping by and leave some love!


Saturday, July 14, 2012

Fresh Strawberry Cake

Happy Saturday everybody!   I hope you've had a chance to enjoy your saturday in some way.  There's still time so make it worth while!  One way to do that is to make this delicious Fresh Strawberry Cake that I made today!  It's absolutely delicious and everything you want in a strawberry cake.  It's moist and just sweet enough with real strawberries throughout. (full recipe at bottom)

So, the first thing you'll need are...
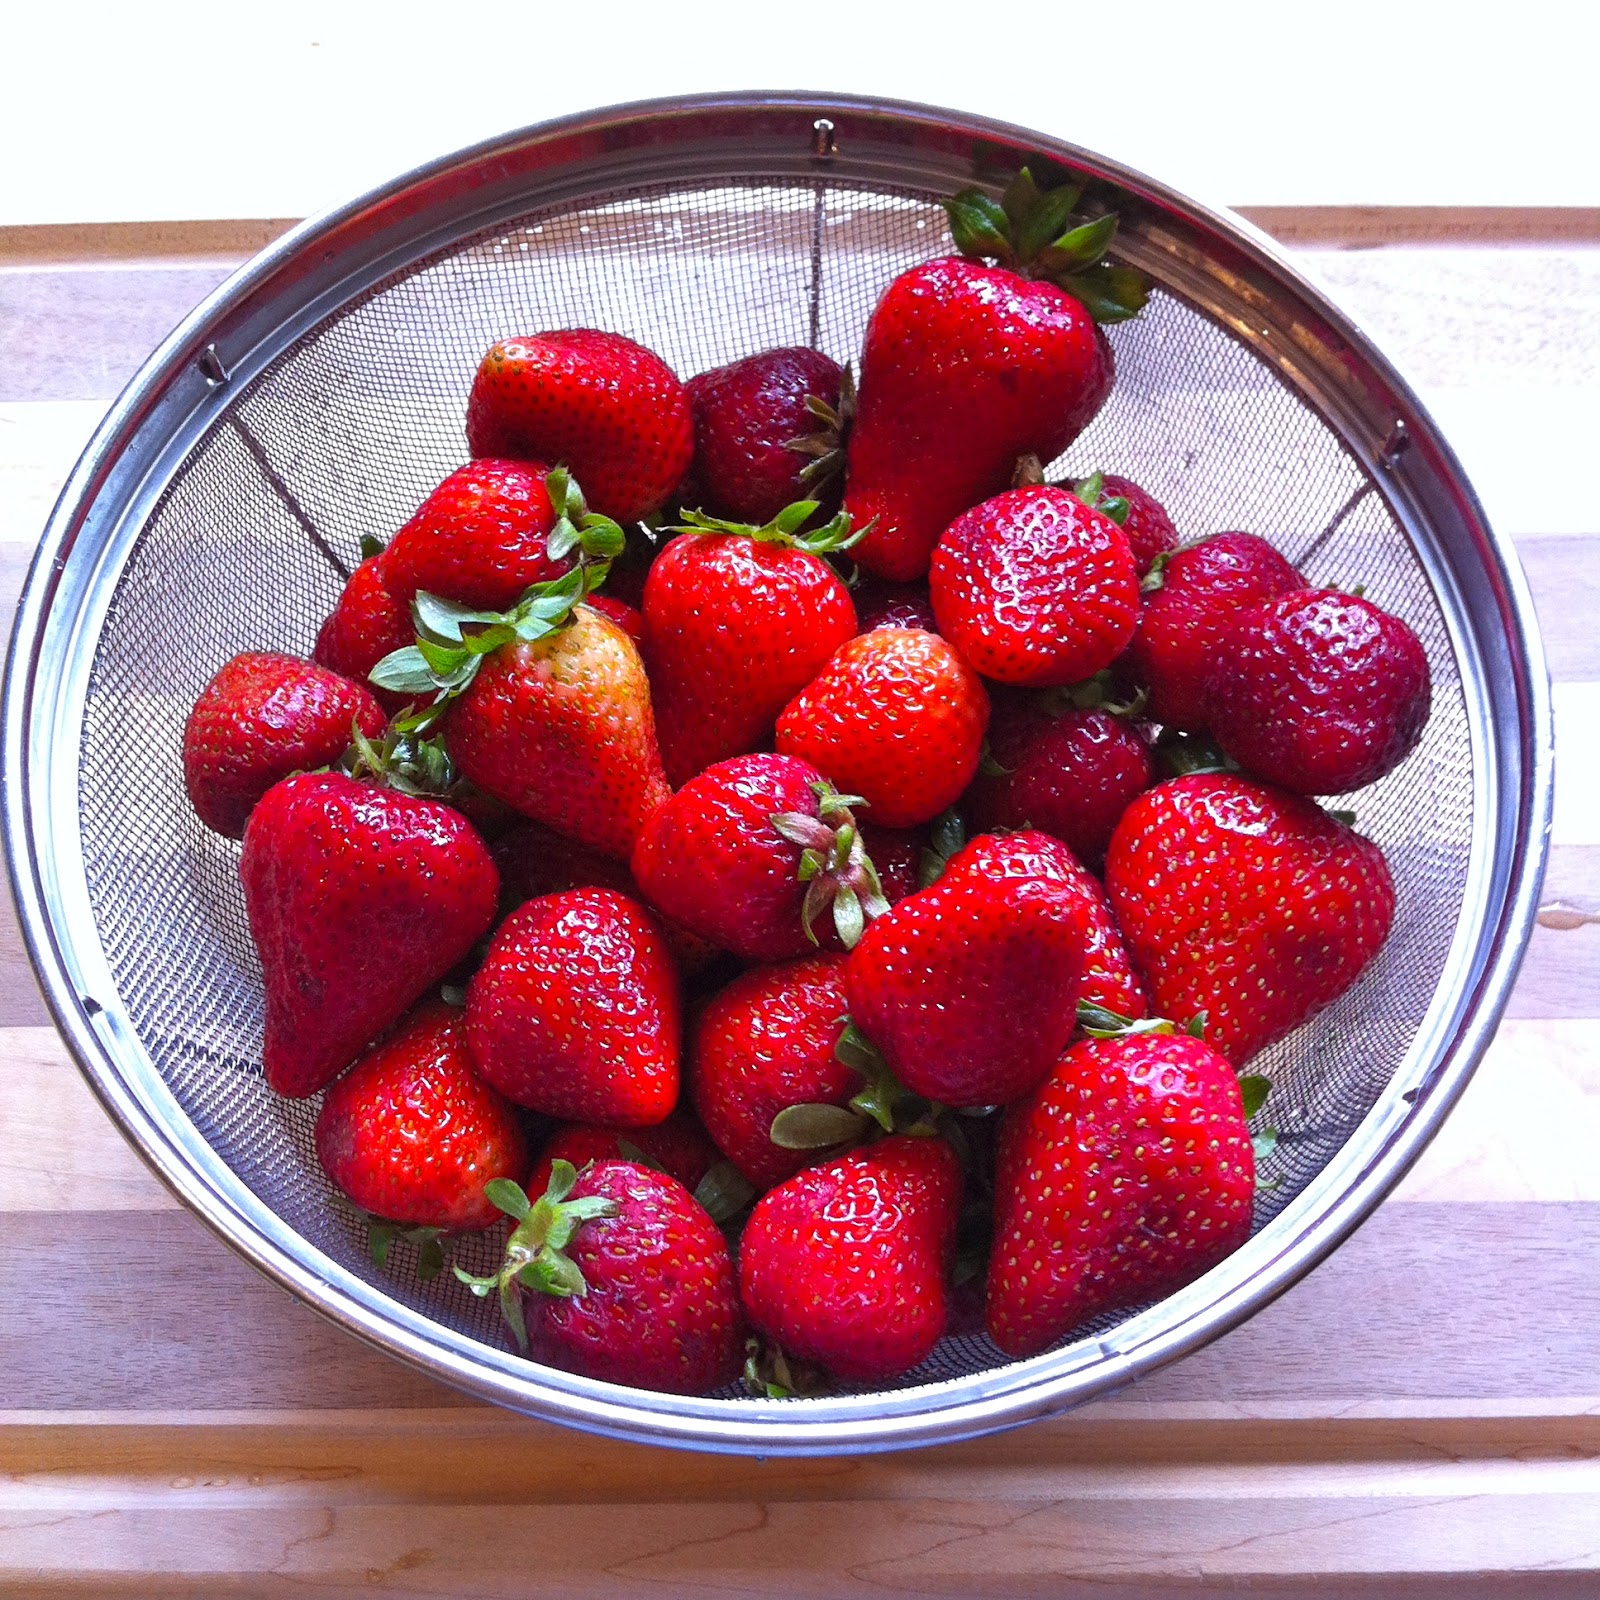
BEAUTIFUL, FRESH STRAWBERRIES!! 
2 cups sliced plus 3 Tbsp of strawberry jam to make the puree... 

and 2/3 cup chopped to mix into cake.

Grease or butter your cake pans or line your muffins tins.  I used 2 round 6" cake pans. 

 Whisk together the flour, soda, powder and salt.  Set aside.

 Add 11 tablespoons of butter and 1 1/3 cup of sugar to your mixer and... cream it together!


 Whisk 3 eggs together and slowly add to your mixer.


Now take the strawberries from the stove that have been simmering for about 3-5 minutes and drain the juices into a container to use in the icing later.  Blend the rest and mix 1 1/3 C of the puree to 1/2 cup of plain greek yogurt and 1 Tbsp of vanilla.

Mixed.

Now, take your flour mixture and the strawberry mixture and add them alternately to the mixer, beginning and ending with flour.  Stir in the chopped strawberries.

 Pour into your prepared pans and bake in a 350 degree oven for 35-40 mins.

The icing I decided to use is a new recipe I found on pinterest.  It's a marshmallow cream buttercream.  I slightly altered it based on reviews and my taste.  This recipe only made enough to fill my layers which is fine with me since this cake tastes better with just a touch of buttercream. (full original recipe below)

Mix 7 oz mallow cream in mixer. 
 I added 1 cup butter, 1 tsp vanilla, chopped lemon zest from one lemon, 1 tsp lemon juice and 3 tsp reserved strawberry juices.  Blend on medium-high until light and fluffy.

When my cakes came out of the oven I removed them from the pan and let them cool a bit before I torted them.  However I did not wait long enough when I decided to ice the first layer and so the icing began to soften and liquify the butter.  I was just too impatient but I knew I would have a sloppy mess on my hands if I didn't wait to ice the rest.  So.  I waited.  Poo.

What I ended up with was nothing short of magically delicious but the bottom layer of icing completely melted into the layers of cake surrounding it.  I think that might have made it taste better!

As you can see the bottom layer looks like one thick layer because the icing melted right into the warm cakes!

I can tell you that this was extremely tasty and I was ohh'ing and mm'ing the whole time I was eating my slice!  I hope you get a chance to make this and I hope you enjoy it as much as I do!


Natalia's Fresh Strawberry Cake


2.5 C cake flour
1 Tbsp + 1/2 tsp baking powder
1/4 tsp baking soda
1 tsp salt
11 TBL unslated butter (1 stick + 3 TBL)
1 1/3 C sugar
3 eggs
4 oz greek yogurt 
1 1/3 C strawberry puree* (2 C fresh strawberries + 3 TBL real strawberry jelly)
1 Tbsp vanilla
2/3 C chopped fresh strawberries

1. Line muffin pans
2. Sift flour, baking power, baking soda and salt together and set aside.
3. Cream butter and sugar together in your mixer.
4. Wisk the eggs together, then beat in slowly, scraping the bowl down halfway through.
5. Combine sour cream, strawberry puree and vanilla in a small bowl.
6. Add flour and strawberry mixture in alternating batches beginning and ending with the flour. 
7. Stir in fresh strawberries, pour into muffin pans and bake 12-15 min. or until toothpick comes out with a few crumbs.
* Strawberry puree – Take 2 cups of sliced, fresh strawberries. Put in small saucepan over med heat with 3 Tbl real strawberry jelly. Cook for about 5-8 min until softened and juices emerge. Strain out the juice (set aside the juice to use in your frosting if you desire) and puree the strawberries in a blender/food processor until smooth. 


16 ounce(s) Marshmallow Cream
1 1/2 cup(s) Butter, softened
5 teaspoon(s) Fresh Lemon Juice
1 teaspoon(s) Vanilla Extract
1/2 cup(s) Confectioners' Sugar


Beat the marshmallow cream using an electric mixer set on low. Add the butter (in 1-inch pieces) and beat until smooth. Add the lemon juice, vanilla extract, and confectioners' sugar, scraping down the sides of the bowl occasionally, and continue to beat on medium-high until smooth and fluffy.


As always...be blessed, thanks for stopping by and leave some love!

Wednesday, July 11, 2012

Gluten Free Chocolate Cake

Lookie what I found when I was perusing through my older posts!  A draft of a post that I never finished from October of 2011!!  So now all you guys get an extra post today!  Yippee!!!!


Howdy friends!  I get quite a few requests for gluten free stuff but I'll have to admit I'm not an expert on the subject and I'm learning as I go.  I have recently, meaning about 3 months ago, stumbled upon an incredible recipe for a chocolate cake that is "Gluten-Free"!  You can find the original recipe here.

I was in need of a dessert for a ladies' get together that I hosted back in August and knew that a couple of the ladies are on gluten-free diets.  So, I began my search for a chocolate cake with no flour.  I found more than I realized were out there but few of them pulled at my chocolate heartstrings and still more just seemed like the same recipe by someone else.  So.  I had to whittle down my choices and decided to try the one I now use as my go-to gluten-free chocolate cake.  The ingredient list was simple and the instructions seemed fairly easy.  So off I went to create this dessert.

Sugar, salt, water, butter, eggs & CHOCOLATE!  Simple right?

You'll want to preheat the oven to 300 degrees and prepare a springform pan of 9" or 10" with parchment.

Dissolve the sugar and salt in the water over medium heat.  Set aside.

 Melt the chocolate over a simmering pot of water (double boiler) until melted.

Nice and smooth.

Begin adding the butter 1 tablespoon at a time.  It might look dry at first but it will get nice and glossy.

Then add the sugar syrup and incorporate.

Now you will add the eggs one at a time until incorporated.

Pour it in your prepared pan.  See how I left the parchment hanging out.  You can cover the inside completely if you want.

Tap out any air bubble and even out batter.

Bake at 300 for about 45 min.  The center will not be set and will be "jiggly".  I put mine in another pan just in case of leakage.  I've not had it leak yet though.

Then...Tada!  It's done but it needs to finish setting and cooling in the fridge for a couple of hours or overnight.

The finished product.  Topped with fresh whipped cream and raspberries.


Here's what the inside looks like.  It's a fudgey, cakey, gooey deliciousness!  Not sure why there's tabasco in the background.  I know we did not put tabasco on this heavenly dessert!


...and that's all she wrote.

As always...be blessed, thanks for stopping by and leave some love!