Showing posts with label Cakes. Show all posts

Sunday, August 12, 2012

White and Black Lace Lingerie Shower

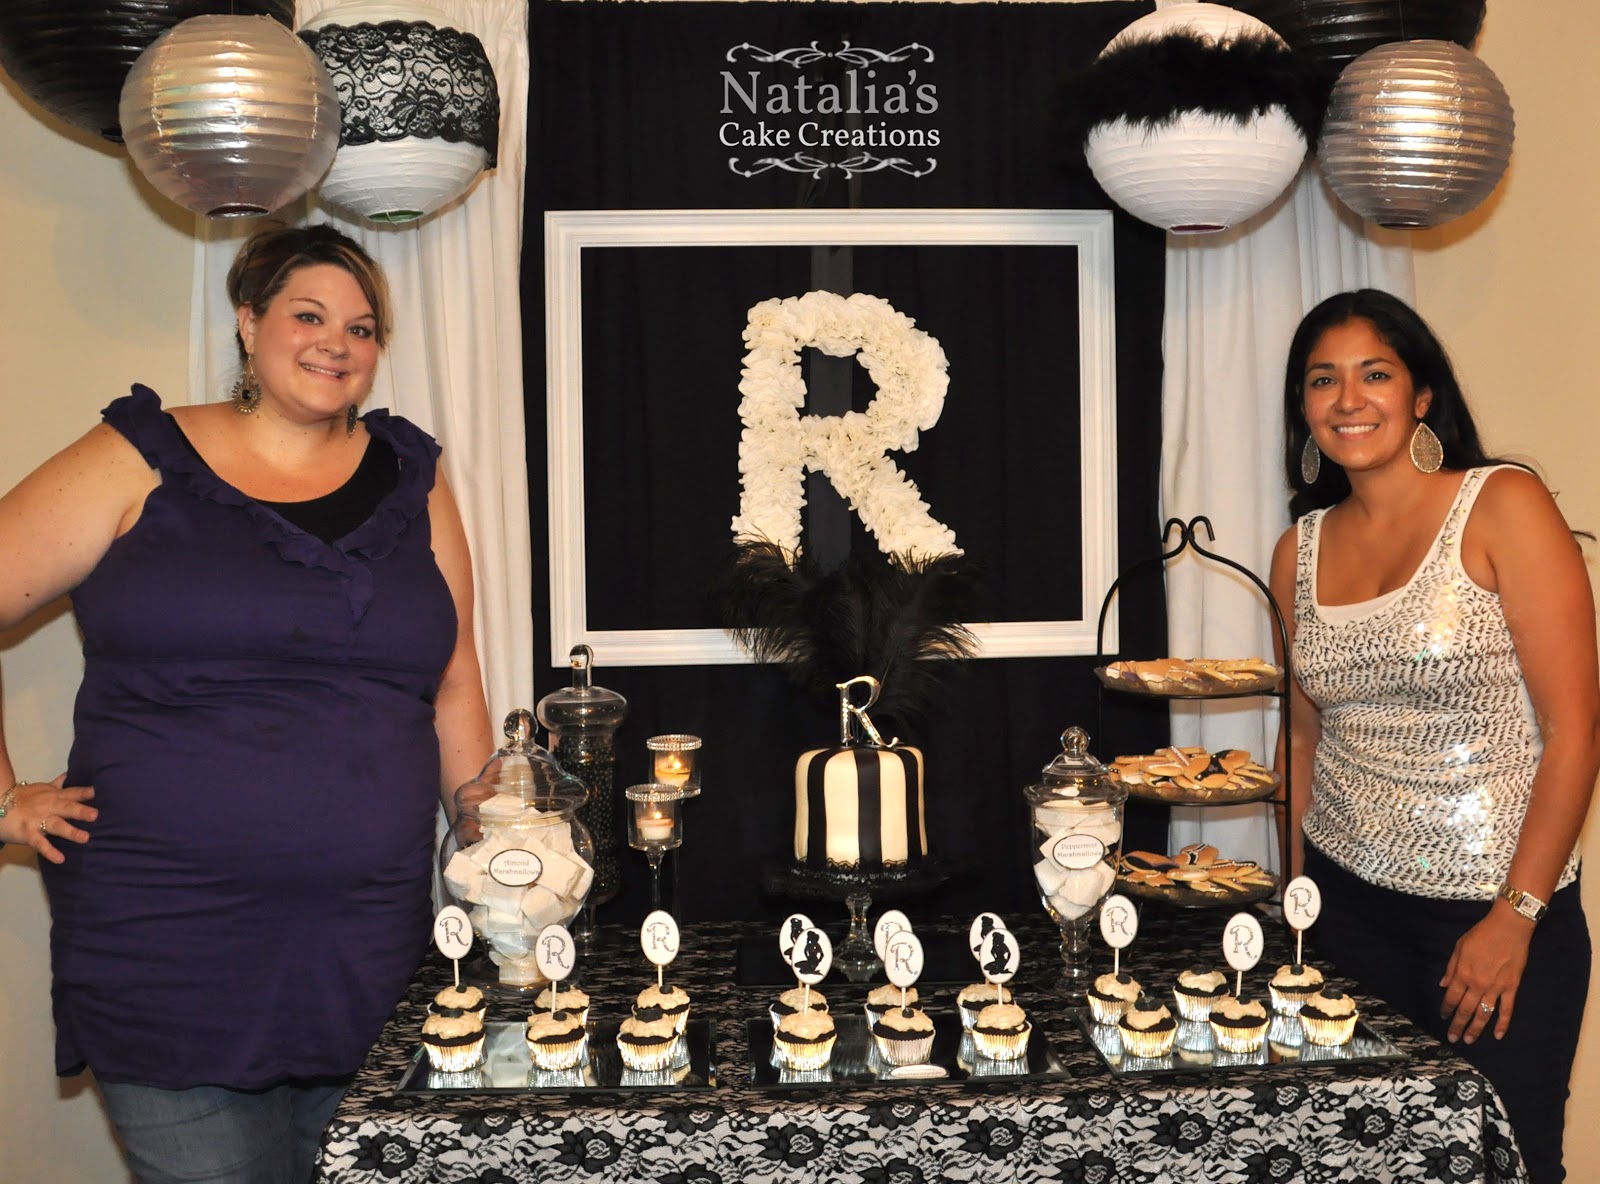
Here are a few pictures from my sister-in-law's lingerie party this weekend. 
 I created the desserts which included a vanilla cake with swiss meringue buttercream, chocolate cupcakes with smbc, almond and peppermint marshmallows and "lingerie" sugar cookies.  All were dairy-free except for the cupcakes.  I added the cupcake toppers that I embellished with glitter.  My other sister-in-law created the "R" with coffee filters and we used sheets for the backdrop.


We were so glad with how everything came together and we had such a great time doing it!

Another hostess with the mostess and an incredible smile!

The food table had 3 salads, grilled chicken breast strips, hummus with pita chips, fruit with caramel, rolls and a veggie tray which was provided by the other hostesses.  Thank you ladies!  We had more than enough and it was ALL delicious!!  I cut out the "R", painted it and added a lace flower.

Now all we have left to plan is a wedding shower, a bachelorette party and the wedding!  So exciting!

As always...be blessed, thanks for stopping by and leave some love!


Saturday, July 14, 2012

Fresh Strawberry Cake

Happy Saturday everybody!   I hope you've had a chance to enjoy your saturday in some way.  There's still time so make it worth while!  One way to do that is to make this delicious Fresh Strawberry Cake that I made today!  It's absolutely delicious and everything you want in a strawberry cake.  It's moist and just sweet enough with real strawberries throughout. (full recipe at bottom)

So, the first thing you'll need are...
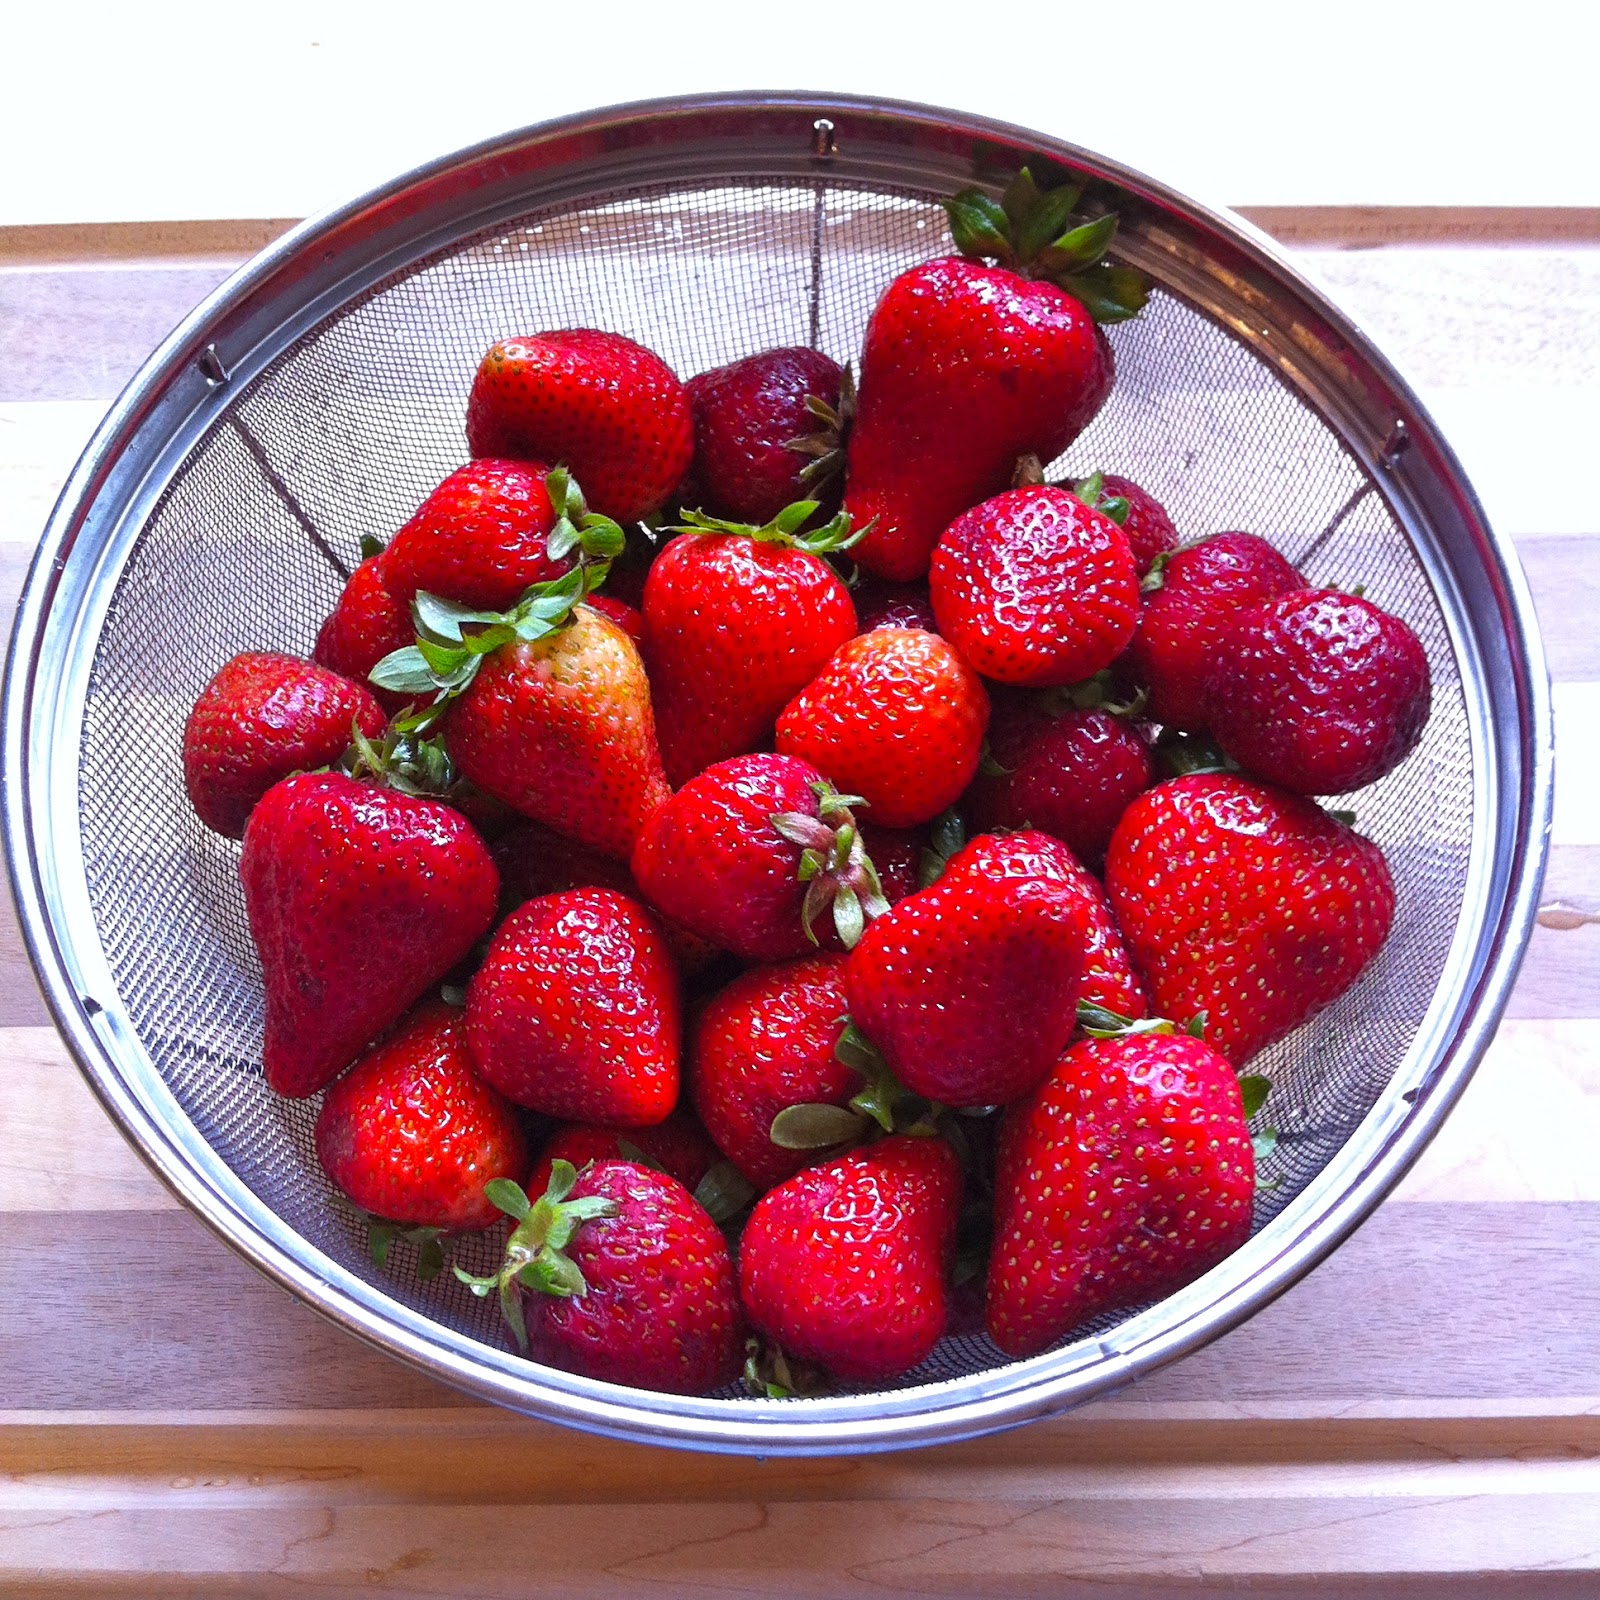
BEAUTIFUL, FRESH STRAWBERRIES!! 
2 cups sliced plus 3 Tbsp of strawberry jam to make the puree... 

and 2/3 cup chopped to mix into cake.

Grease or butter your cake pans or line your muffins tins.  I used 2 round 6" cake pans. 

 Whisk together the flour, soda, powder and salt.  Set aside.

 Add 11 tablespoons of butter and 1 1/3 cup of sugar to your mixer and... cream it together!


 Whisk 3 eggs together and slowly add to your mixer.


Now take the strawberries from the stove that have been simmering for about 3-5 minutes and drain the juices into a container to use in the icing later.  Blend the rest and mix 1 1/3 C of the puree to 1/2 cup of plain greek yogurt and 1 Tbsp of vanilla.

Mixed.

Now, take your flour mixture and the strawberry mixture and add them alternately to the mixer, beginning and ending with flour.  Stir in the chopped strawberries.

 Pour into your prepared pans and bake in a 350 degree oven for 35-40 mins.

The icing I decided to use is a new recipe I found on pinterest.  It's a marshmallow cream buttercream.  I slightly altered it based on reviews and my taste.  This recipe only made enough to fill my layers which is fine with me since this cake tastes better with just a touch of buttercream. (full original recipe below)

Mix 7 oz mallow cream in mixer. 
 I added 1 cup butter, 1 tsp vanilla, chopped lemon zest from one lemon, 1 tsp lemon juice and 3 tsp reserved strawberry juices.  Blend on medium-high until light and fluffy.

When my cakes came out of the oven I removed them from the pan and let them cool a bit before I torted them.  However I did not wait long enough when I decided to ice the first layer and so the icing began to soften and liquify the butter.  I was just too impatient but I knew I would have a sloppy mess on my hands if I didn't wait to ice the rest.  So.  I waited.  Poo.

What I ended up with was nothing short of magically delicious but the bottom layer of icing completely melted into the layers of cake surrounding it.  I think that might have made it taste better!

As you can see the bottom layer looks like one thick layer because the icing melted right into the warm cakes!

I can tell you that this was extremely tasty and I was ohh'ing and mm'ing the whole time I was eating my slice!  I hope you get a chance to make this and I hope you enjoy it as much as I do!


Natalia's Fresh Strawberry Cake


2.5 C cake flour
1 Tbsp + 1/2 tsp baking powder
1/4 tsp baking soda
1 tsp salt
11 TBL unslated butter (1 stick + 3 TBL)
1 1/3 C sugar
3 eggs
4 oz greek yogurt 
1 1/3 C strawberry puree* (2 C fresh strawberries + 3 TBL real strawberry jelly)
1 Tbsp vanilla
2/3 C chopped fresh strawberries

1. Line muffin pans
2. Sift flour, baking power, baking soda and salt together and set aside.
3. Cream butter and sugar together in your mixer.
4. Wisk the eggs together, then beat in slowly, scraping the bowl down halfway through.
5. Combine sour cream, strawberry puree and vanilla in a small bowl.
6. Add flour and strawberry mixture in alternating batches beginning and ending with the flour. 
7. Stir in fresh strawberries, pour into muffin pans and bake 12-15 min. or until toothpick comes out with a few crumbs.
* Strawberry puree – Take 2 cups of sliced, fresh strawberries. Put in small saucepan over med heat with 3 Tbl real strawberry jelly. Cook for about 5-8 min until softened and juices emerge. Strain out the juice (set aside the juice to use in your frosting if you desire) and puree the strawberries in a blender/food processor until smooth. 


16 ounce(s) Marshmallow Cream
1 1/2 cup(s) Butter, softened
5 teaspoon(s) Fresh Lemon Juice
1 teaspoon(s) Vanilla Extract
1/2 cup(s) Confectioners' Sugar


Beat the marshmallow cream using an electric mixer set on low. Add the butter (in 1-inch pieces) and beat until smooth. Add the lemon juice, vanilla extract, and confectioners' sugar, scraping down the sides of the bowl occasionally, and continue to beat on medium-high until smooth and fluffy.


As always...be blessed, thanks for stopping by and leave some love!

Wednesday, July 11, 2012

Gluten Free Chocolate Cake

Lookie what I found when I was perusing through my older posts!  A draft of a post that I never finished from October of 2011!!  So now all you guys get an extra post today!  Yippee!!!!


Howdy friends!  I get quite a few requests for gluten free stuff but I'll have to admit I'm not an expert on the subject and I'm learning as I go.  I have recently, meaning about 3 months ago, stumbled upon an incredible recipe for a chocolate cake that is "Gluten-Free"!  You can find the original recipe here.

I was in need of a dessert for a ladies' get together that I hosted back in August and knew that a couple of the ladies are on gluten-free diets.  So, I began my search for a chocolate cake with no flour.  I found more than I realized were out there but few of them pulled at my chocolate heartstrings and still more just seemed like the same recipe by someone else.  So.  I had to whittle down my choices and decided to try the one I now use as my go-to gluten-free chocolate cake.  The ingredient list was simple and the instructions seemed fairly easy.  So off I went to create this dessert.

Sugar, salt, water, butter, eggs & CHOCOLATE!  Simple right?

You'll want to preheat the oven to 300 degrees and prepare a springform pan of 9" or 10" with parchment.

Dissolve the sugar and salt in the water over medium heat.  Set aside.

 Melt the chocolate over a simmering pot of water (double boiler) until melted.

Nice and smooth.

Begin adding the butter 1 tablespoon at a time.  It might look dry at first but it will get nice and glossy.

Then add the sugar syrup and incorporate.

Now you will add the eggs one at a time until incorporated.

Pour it in your prepared pan.  See how I left the parchment hanging out.  You can cover the inside completely if you want.

Tap out any air bubble and even out batter.

Bake at 300 for about 45 min.  The center will not be set and will be "jiggly".  I put mine in another pan just in case of leakage.  I've not had it leak yet though.

Then...Tada!  It's done but it needs to finish setting and cooling in the fridge for a couple of hours or overnight.

The finished product.  Topped with fresh whipped cream and raspberries.


Here's what the inside looks like.  It's a fudgey, cakey, gooey deliciousness!  Not sure why there's tabasco in the background.  I know we did not put tabasco on this heavenly dessert!


...and that's all she wrote.

As always...be blessed, thanks for stopping by and leave some love!


Tuesday, July 10, 2012

So glad you're back!!

Well, hello there stranger!!  I was getting worried that I hadn't seen you around in a while...sheesh it's been what...9 months!

What have you been up to all this time?  Wait.  What?  I'm the one whose been gone??  (nervous laugh)   So you've noticed, huh?  Well, shoot!  I was hoping I could sneak that one passed you.

Let's look on the bright side...at least you noticed I was gone!  That' makes me feel so special and loved, knowing that you've been sitting around, anxiously twiddling your thumbs, waiting for my next incredible life changing post!  Okay, so maybe that's stretching it a bit but it makes me feel better than having to face the fact that I was being a lazy blogger.  Goodness!  Confessions are just spewing out my mouth right and left!  I better be careful or I just might spill the beans about other things like telling my hubby that the boys ate the last of his beloved Nutella on a slice of warm, preservative-free toast from Trader Joe's.  psst.  It was me.  hehehe.


OKAY!  Enough of this silliness.  Let's get down to business.  To be completely honest, I have been busy.  There's too much from 9 months to fill you in on so I'll just jump straight to most recent stuff which includes some pretty awesome cakes if I may say so myself!  I'll need to keep this relatively short since my parents will stopping by in a few. note: if you're following Natalia's Cake Creations on FB then you'll have seen these already.

First up is a Tiffany bag cake that I created for a Bat Mitzvah.  My first cake of this design for my first party of this kind.  I think it turned out pretty nice!  The letters are hand painted...I was pretty pleased with myself!


Next we have a birthday cake for a friend's daughter and an anniversary cake for my church.   They are both iced in Swiss meringue buttercream with hand cut fondant decorations.  I was very pleased with both of these.


This next one is what I created for my son's kinder class graduation.  I thought it turned out so cute with the owl on it and I loved seeing the reaction on some of the parents' faces when they realized that I had made it!  Talk about a proud mama!


The last cake I will leave you with is a baby shower cake I designed for one of my dear friends.  They are a family of musicians and have the biggest hearts.  I used a template from here to create the basic shape of the shoes but had to enlarge it to the size I needed.  I loved the way this one turned out and so did the couple.


Okay, so that's all for now.  I need to go sweep up the spilled fruit loops and throw away the banana peels that I'm sure are laying around in the tv room.  My youngest LOVES bananas and will eat 2-3 at a time leaving a trail of peels along the way...my little monkey.

I hope that you are as glad as I am about coming back to my blog and finding I'm still alive.  I know I'm glad I'm still alive!  I'll be sure to keep you regularly updated and share more exciting things that have happened and will be happening.

As always...be blessed, thanks for stopping by and leave some love! (that means comments)


Tuesday, September 13, 2011

Airplane Shower Cake

Hello friends!  I know I haven't said much the past couple of weeks but I'll blame that on still trying to figure out my new schedule and on not having much to say lately.  Actually I've been feeling particularly quiet.  Not sure why that is but I think sometimes it just needs to be.  Remember...Silence is Golden!

My latest creation was for a baby shower this past weekend.  The theme was Aviator and I suggested using the colors of orange, light blue and navy.  Then I decided to do silver too and the navy turned into more of a brighter blue.  The concept was to have an airplane on top of the cake which was the sky with clouds around it and a banner.

I love working with this particular customer, who has placed orders before, because she pretty much let's me design whatever I want.  LOVE those kind of customers.  Not because I can do whatever but because that shows they trust my creativity and eye for design when dealing with a cake.

So here's the finished product which, honestly, turned out much cuter than I initially thought.  I love it when that happens too!  It's a vanilla buttermilk cake with a white chocolate raspberry swiss meringue buttercream.  Yeah, try saying that three times fast!  Actually, don't, just eat it...you'll be glad you did.


I also made little orange and blue propellors for some cupcakes for the kiddos.  Those turned out pretty cute too but we'll just pretend that I have a pic of those, mmmkay.

If I happen to come up with something else exciting to share I'll be sure to let you know.   Until next time...

As always, God bless, leave some love and thanks for stopping by!

Wednesday, August 31, 2011

Car Cake

I'm gonna leave you with a short post today about the car cake that I made last weekend for an MBA Grad.

This is the first car cake I have done and let me just be honest with you...I learned A LOT!  It didn't come out exactly how I wanted and I had some support issues with the back end.  To put it plainly this was "supposed" to be a Corvette cake but because I had trouble with some of the body styling...curves, lines and what not, it's just a car cake...with a Corvette emblem.  Go easy on me but I would appreciate some creative criticism.

The cake itself was chocolate with vanilla buttercream and everyone actually seemed to really enjoy eating it.  If you took pictures at the event of the cake and don't mind sharing them with me I'd really appreciate it!

This cake weighed about 70 pounds so it was difficult for me to move it to a more suitable backdrop for pictures.  I just had to take it on my counter. :-)  It ended up being 24" long, 10" wide and 8"high.  A BIG cake!

The front.

The back.

It turned out lumpier than I wanted.  It was just a difficult first time cake overall.  I was glad to have the opportunity and the customer seemed super happy with it!  So there you have it.  

As always, God bless, leave some love and thanks for stopping by!