Showing posts with label Decorating. Show all posts

Tuesday, August 28, 2012

Pencil Sugar Cookie's...How did you...?

It's the start of a new school year!  The kids went back to school and it was great!  They were glad to go back and see all their friends.  They are happy with their teachers...whew!  One less drama to deal with.

You know those pencil cookies I showed you on my last post?  Well, today I'm gonna show you how I did them and what I learned that I would do differently next time.  Remember I'm still fairly new cookie decorating so don't hold me too close to the fire.
I did the pencils in the school's colors so that's why they are only red and blue.  Like I mentioned in my previous post I decided to make these after I saw Georgeanne's pencil cookies on her blog, LilaLoa.  Her's are adorable!!

Yes, I made apples too and some circles to write messages on.  The cookie cutter I used was actually a candle that I found at Sur la Table on clearance for $0.49!!
{via}

That's why the sides are bumpy and I didn't bother smoothing them out.  I used my go to Vanilla Sugar Cookie Recipe from LilaLoa's blog.  It's so yummy and bakes beautifully... when you remember to take them out in time. :-\

I followed her steps on outlining them but used a #1 tip which made it a little difficult for me and I think I had my royal icing a bit too thick.  Next time I'll use a #2 and thin it just a little more.  I did add cocoa to my icing to help achieve the black color and I gotta say I LOVED it!  It smelled soooo good!

After they dried a few minutes I started filling in the areas .  Starting with the "metal" bands, then the eraser, the "wooden" tips and lastly the body.  As you can see I did the outside lines first.
 I let them dry for about 20 min. then filled in the middles.  The blue pencils I did the same way.

I'm not sure if you can tell but I added some silver luster dust to the "metal" bands to give it a bit of a shimmer.  I had a lot of fun and  learned a lot making them.  Here are all of the finished cookies!!


 I delivered these last week to the teachers for them to enjoy and they all were saying how much they loved them!  I am really grateful for the wonderful teachers at our school and all the effort they put forth to care for and teach the students!  Have a great school year!!!

As always...be blessed, thanks for stopping by and leave some love!


Sunday, August 12, 2012

White and Black Lace Lingerie Shower

Here are a few pictures from my sister-in-law's lingerie party this weekend. 
 I created the desserts which included a vanilla cake with swiss meringue buttercream, chocolate cupcakes with smbc, almond and peppermint marshmallows and "lingerie" sugar cookies.  All were dairy-free except for the cupcakes.  I added the cupcake toppers that I embellished with glitter.  My other sister-in-law created the "R" with coffee filters and we used sheets for the backdrop.


We were so glad with how everything came together and we had such a great time doing it!

Another hostess with the mostess and an incredible smile!

The food table had 3 salads, grilled chicken breast strips, hummus with pita chips, fruit with caramel, rolls and a veggie tray which was provided by the other hostesses.  Thank you ladies!  We had more than enough and it was ALL delicious!!  I cut out the "R", painted it and added a lace flower.

Now all we have left to plan is a wedding shower, a bachelorette party and the wedding!  So exciting!

As always...be blessed, thanks for stopping by and leave some love!


Sunday, August 5, 2012

Sneak Peek...

It's been a week since my last post but I assure you that just because I haven't posted does NOT mean I'm not busy.  I have totally been busy planning, creating and pulling together some things for a lingerie shower next weekend!  It's been a lot of fun and I really enjoy being creative...seeing if an idea works or if a Pinterest project turns out the way it says.  So far so good!

Now I can't reveal everything to you about the shower yet but I can give you a few ideas.  We (myself and the other hostesses) have pulled together elements from several other parties to create the look we are going for.  Here are a few and they can all be found on my Pinterest board as well.

{via}
{via}

{via}

Cute right!!!

Now, that's all I can give you for now and I probably won't post again until after the shower.  So, that will give you another week without me...sad, I know.  I'm such a bad blogger friend.

On another semi-related note there might be a hurricane heading our way to Texas next week and I'm hoping that's it's just a lot of hype and won't turn into anything serious.  That might ruin our shower plans!!  So I'll be keeping an eye on this Ernesto.  I mean who does he think he is scaring us helpless party planning gals into thinking we might not get to see out dreams come to fruition after all this planning and preparing.  Seriously, that is totally rude.  What makes it's worse is that he seems so indifferent to our plans, like he has no choice in the path his winds and rain take him. Pfft!  Rude!

I hope he comes to his senses and reconsiders the path he's choosing.

As always...God bless, thanks for stopping by and leave some love!


Saturday, July 21, 2012

Cinnamon Swirl Cupcakes and Baby Shower

Okay!  I promise this is my last installment of the cinnamon themed desserts!  Pinky promise. :-)

I knew I could make a cinnamon "roll" flavored cupcake but I wanted to do more than just add cinnamon and a sprinkle of brown sugar so I did a little research and found an easy solution from Darla at Bakingdom!  Thank you Darla!  This was just what I was looking for.  I just altered the cinnamon sugar ratios a bit.

I ended up using a different vanilla cake recipe and then added the cinnamon sugar swirl to them.  So here I have my cups half the batter in the bottom and I made a little well to put about a teaspoon of my cinnamon mixture in.  Then added the other half of my batter and made another well to put a 1/2 teaspoon of cinnamon mixture into.  Lastly, you take a toothpick and swirl it! I love the one in the middle that looks like a heart! :-)  Bake at 350ºF for 12-15 min and they're done!


Now I had to taste one...of course!  So I topped it with a cream cheese buttercream and you know what? Heaven!!!!  These guys are insane good!

Yeah, that's pure yumminess, right there!


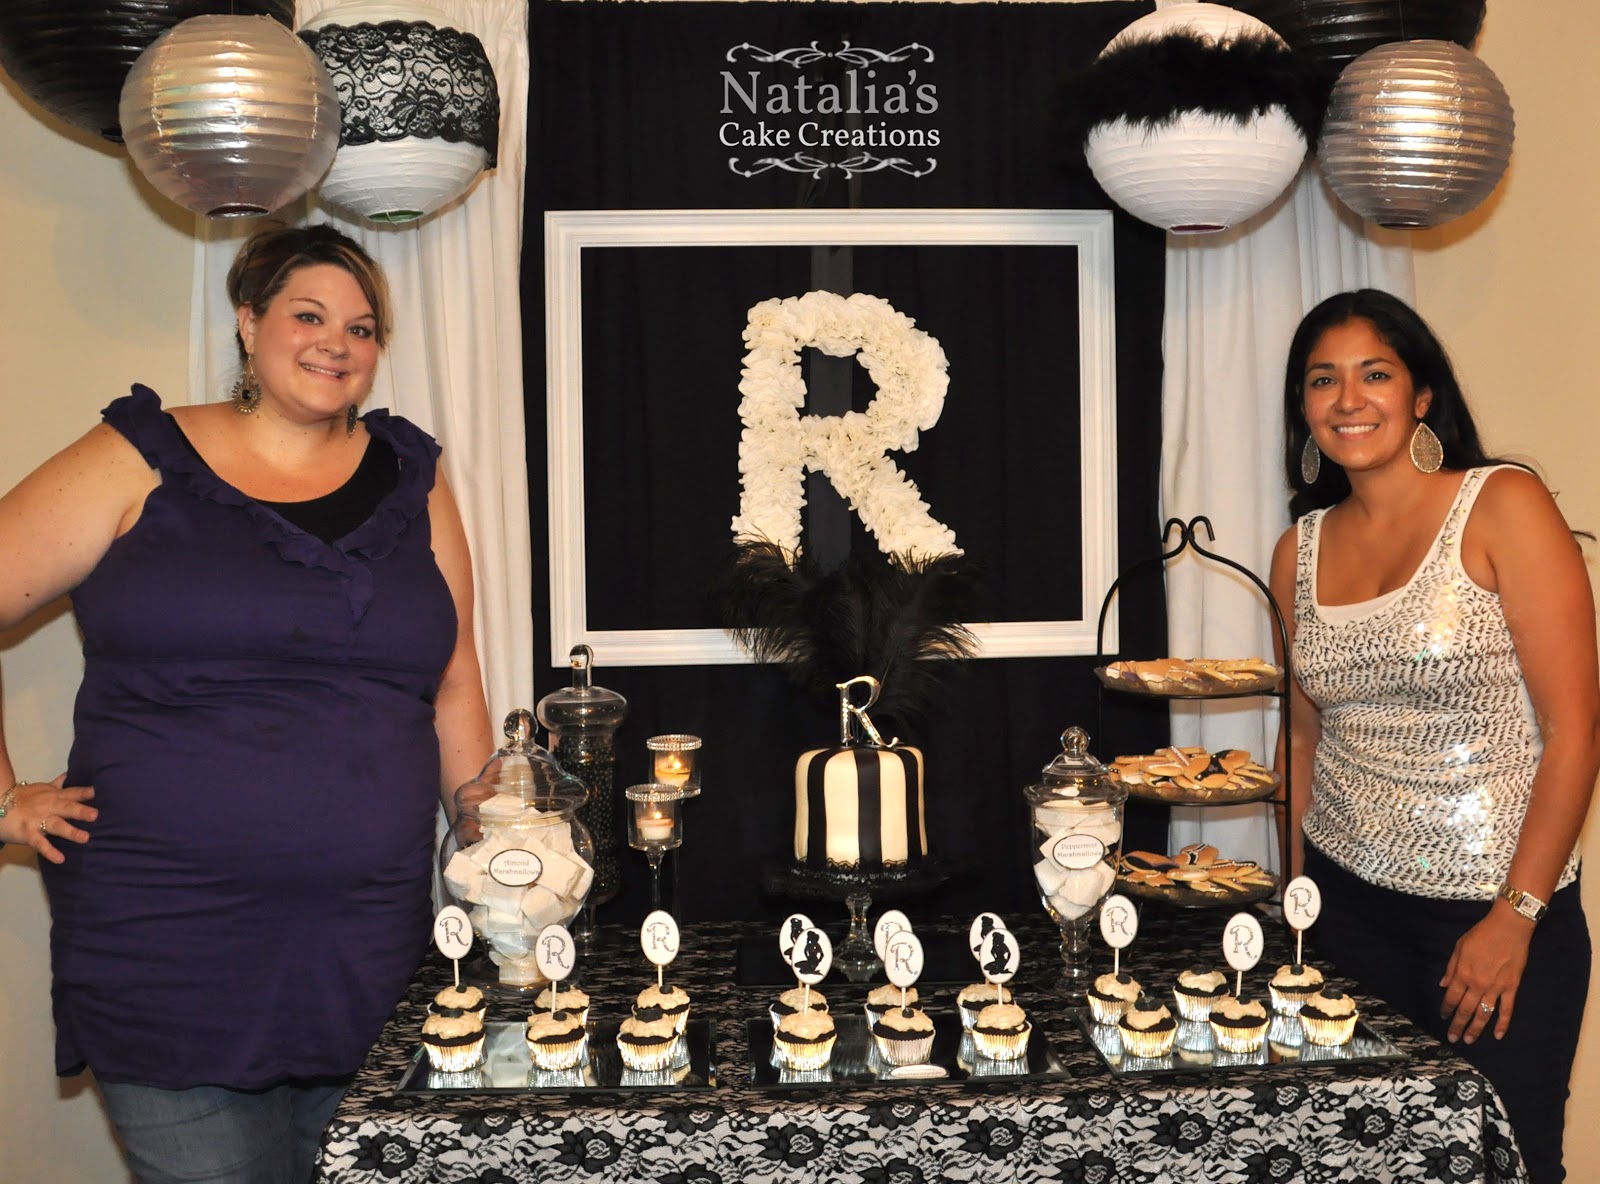
Onto the shower!  So I had my FIL make me an oven to go along with our bun in the oven theme, which, I'll be honest, kind of got lost in our preparation.  But I still think it looked super cute and everyone was impressed!  This was our dessert table.  Cupcakes, cookies, marshmallows, oh my!


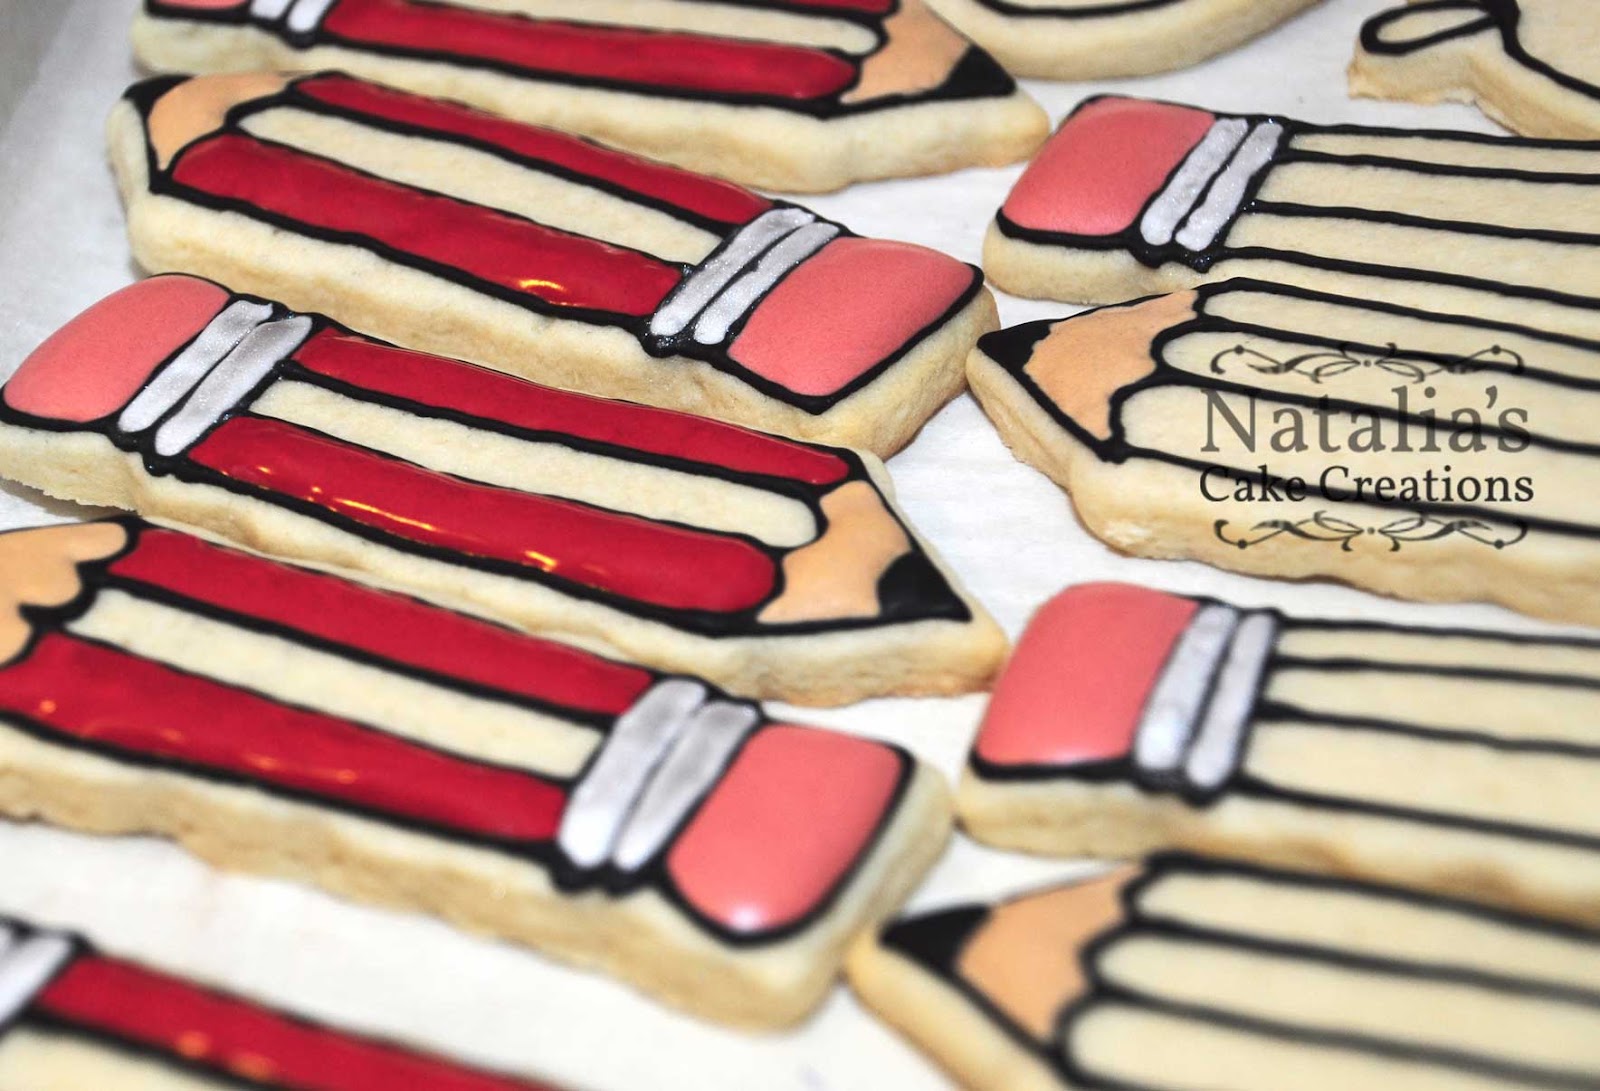
Below are my cinnamon swirl cupcakes all dressed up with cute fondant flowers and leaves, cinnamon roll cookies in the front, cinnamon marshmallows (white) to the left and the pink things in the glass jar are almond marshmallows.  To the far right are Little Debbie cinnamon rolls!

 Here's the awesome oven that was made for us and you can't see it but there are yellow an blue flames painted on the burners! :-)  How cute is this!

To the left are store bought cinnamon rolls that we warmed, more cinnamon cookies and pink and orange almond marshmallows!  The dish with "cream" in it is the extra cream cheese buttercream that guests can spread on their cookies or add to their cinnamon rolls.  Um, yeah, we had no complaints there!

...and...a few close ups of some of the desserts.  We all love close ups don't we!


Everyone enjoyed themselves and had a good time, especially since this was a couples shower and that can sometimes be a daunting thing for men.  So I was very pleased with how everything turned out!  Thanks for letting me share!

As always...be blessed, thanks for stopping by and leave some love!

Sunday, May 29, 2011

Progress Report

Welcome to my "Progress Report".  I've accomplished a couple of things since my "What's New Wednesday" post.  I'd like to share a few of those with you and get some feedback.  I warned you of my sporadic posting habits.  My life is just too hectic right now to be consistent so you'll have to take what I can give ya'.

First, I'll start with my laundry room.  If you recall, I wanted to reorganize it and clean it out.  This is what I've accomplished so far.  See before photos here.

 I painted the walls a soft yellow color that someone else had returned and I got it for 50% off!  I then painted the shelves with a white paint that I already had...Money Saver!  The stencil I ordered from, CuttingEdgeStencils, because I knew what I was looking for and could not find it anywhere else.  It was worth the splurge!  I purchased another small can of orange paint AND a grey/khaki color that I happened to see on the clearance shelf, while I was looking for a red, and knew I could incorporate those colors so I grabbed both!  Again...50% off!  I found a can of "red", at least that was the color splattered around the outside of the can but when I had someone open it for me it was pink!  So glad I didn't buy it.  Well, I was bummed that I hadn't found a red yet and did NOT want to pay full price but then bells went off in my head and I remembered I had bought a tiny can of red a while back for the boy's room.  I began searching everywhere for that can and finally found it in the garage on a shelf!  SCORE!  The paint quality definitely was not the best but it served it's purpose and I was thrilled.

Below is a picture of an old window frame, one of three that I had purchased for $20 about 7 years ago when we were renting our first home.  I'd kept them this whole time because I really liked them and knew that at some point I would use them.  This particular one I had repainted previously and someone decided to use it as a spray paint tester!  So I carefully removed the glass panes and repainted it with the grey color.


You can see the window on the right side of the picture.  I'm not sure if that's where it will stay so if you have a suggestion I'd love to hear it!
As you can see the floors aren't done...BUT...I got a steal on the tiles that I bought for this!  I originally was going to purchase 12" square "sticky" tiles.  They looked the most like real tile for a decent price.  Well when I went to go pick them up they were out!  BUT...the gentleman helping me said that they just got a return for 18" tiles that had the same colors as the ones I wanted except these looked way better.  Well, they were twice the price! :-(  I wasn't about to do that for the laundry room.  The guy came back to me and said he could sell them for HALF PRICE!!!!  That would make these LESS than what I would've paid!  SCORE!!!  Plus I got about 1/2 more square footage!  Double SCORE!!!
I'll have to show those pictures to you when it's completed.  Sorry for making you wait so long.

Well that's all for now.  I'll be posting some cakes that I've done later.